Sunday, December 21, 2014

Spread Christmas Cheer by Baking for All to Eat

In the last post, I told you that I had only baked ONCE all of December- well, I have corrected that...I now have baked an additional 9 dozen cupcakes! Seven dozen of those being in one night...I get so excited about my baking plans they just tend to explode.  This year I really wanted to test out some new Christmas cupcake recipes instead of my standard Chocolate with Peppermint (don't worry I still made this flavor too just added some new ones to the mix). Everyone seemed to love these new flavors!

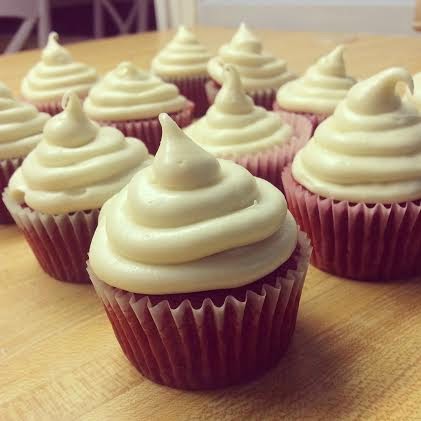
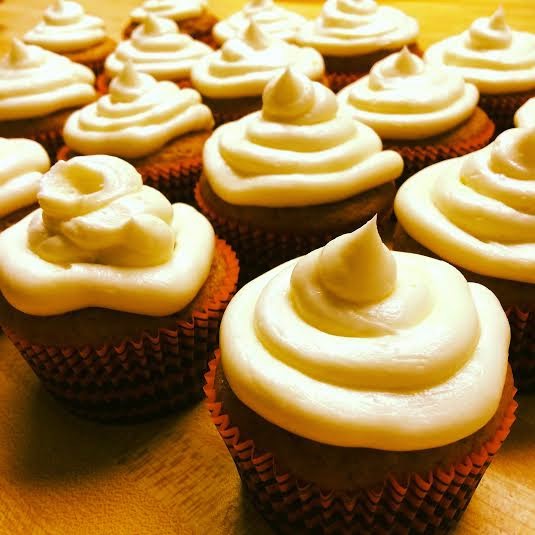
I finally settled on these four cupcakes:
Gingerbread
Eggnog
Chocolate with Peppermint
Snickerdoodle

Gingerbread Cupcakes - originally from Imperial Sugar
Makes 12 cupcakes

5 tablespoons salted butter, room temperature
1/2 cup sugar
1/2 cup molasses
1 egg
1 egg yolk
1 1/4 cups all purpose flour
1 tablespoon cocoa powder
1 teaspoon ground ginger
1 teaspoon ground cinnamon
1/2 teaspoon ground nutmeg
1 teaspoon baking soda
1/2 cup buttermilk

Steps
1. Preheat oven to 350. Line cupcake tin and set aside.
2. Mix butter and sugar with electric mixer about 3 minutes until light and fluffy.
3. Add molasses and then the egg and egg yolk, stir to combine.
4. In a separate bowl whisk together flour, cocoa powder, ginger, cinnamon and baking soda. Add to the butter/sugar/molasses mixture alternating with the buttermilk.
5. Mix until just combined.
6. Divide the batter between the 12 cupcake cups about 2/3 cups full.
7. Bake for 20 minutes I turn the pan halfway through baking
8. Cool completely before frosting.

Cinnamon Cream Cheese Icing Originally from Creme de la Crumb
I got this recipe from a different post because well, cinnamon and cream cheese how can you go wrong?!

Ingredients for Icing
4 cups powdered sugar
4 ounces cream cheese, softened
1 tablespoon cinnamon
1/2 teaspoon vanilla
2-4 teaspoons heavy cream

Steps
1. Beat the cream cheese until fluffy.
2. Add vanilla, cinnamon, and 2 tablespoons of heavy cream and mix until smooth.
3. Gradually add in powdered sugar. Add 1-2 more tablespoons of heavy cream until you get the consistency you want for the icing.
4. Frost your cooled cupcakes and enjoy! I used the star tip for these cupcakes

Eggnog Cupcakes Originally from Life, Love & Sugar
Makes 24 cupcakes
I was quite honestly the most worried about these cupcakes, they didn't turn out as pretty and almost "caramelized" in the oven BUT everyone LOVED them so please don't discard them because they might not be pretty!

Ingredients
1 2/3 cups all purpose flour
1 cup sugar
1 1/4 teaspoon baking powder
3/4 cup butter, room temperature
3 egg whites
1/2 teaspoon vanilla extract
1/2-3/4 teaspoon nutmeg
3/4 cup eggnog I just bought Barber's Eggnog
1/4 cup milk

Steps
1. Preheat oven to 350.  Line cupcake tins and set aside.
2. Whisk together flour, sugar, baking powder in a large mixing bowl.
3. Add butter, egg whites, vanilla, nutmeg, eggnog and milk and mix on medium speed until just combined. Do not overbeat.
4. Divide batter among the cupcake tins.
5. Bake 18 - 20 mins again turning halfway through baking
6. Cool completely before frosting.

Ingredients for Eggnog Icing unfortunately, I can't find the exact eggnog frosting recipe that I used but I will share the one that came with the cupcake recipe
If using a piping tip, double the recipe.
1/2 cup butter
1/2 cup shortening
4 cups powdered sugar
4 tablespoons eggnog
1/4 teaspoon rum extract
1 teaspoon nutmeg

Steps
1. Combine butter and shortening until smooth.
2. Add 2 cups of powdered sugar and mix until smooth.
3. Add eggnog, rum extract and nutmeg, combine until smooth.
4. Add remaining powdered sugar and mix in until smooth.
5. Add a little more eggnog and mixed until desired consistency.
6. Decorate your cupcakes and enjoy!

Chocolate with Peppermint Cream Cheese Frosting, originally from Glorious Treats
Makes 24 cupcakes

2 cups sugar
1 3/4 cups all purpose flour
3/4 cups unsweetened cocoa
1 1/2 teaspoons baking powder
1 1/2 teaspoons baking soda
1 teaspoon salt
2 eggs
1 cup whole milk
1/2 cup vegetable oil
2 teaspoons vanilla extract
1 cup boiling water

Steps
1. Line muffin tin and preheat the oven to 350 degrees.
2. In a large bowl, stir together sugar, flour, cocoa, baking powder, baking soda, and salt.
3. Add eggs, milk, oil and vanilla. Beat on medium speed for about 1 minute.
4. Stir in boiling water your batter will be thin, this is correct.
5. Fill liners about 2/3 full.
6. Bake for 22-24 minutes, turning the pan halfway through.
7. Cool completely before frosting.

Ingredients for Peppermint Cream Cheese Frosting
1/2 cup butter
6 oz. cream cheese
4 cups of powdered sugar
1 teaspoon peppermint extract
1/2 teaspoon vanilla extract
1 to 3 tablespoons heavy cream

Steps
1. Place butter in a mixing bowl and blend slightly. Add cream cheese and blend until combined.
2. Add powdered sugar, a little bit at a time, and blend on low speed until combined. Increase to medium speed until fluffy.
3. Add vanilla and peppermint extracts.
4. Slowly add cream, a little at a time until desired consistency is reached.
5. Beat about a minute, until fluffy.

Because I use a piping tool to frost I usually 1 1/2 the icing recipe, the ingredients above are the original ingredients

Before filling the piping bag or tool, take some of the icing and color it with red food coloring and get a good bit on a knife and drag it down two sides of the piping tool then fill with the white frosting. This works best if every time you refill you make sure you apply plenty of red frosting all the way down the side of the tool. Once you frost the cupcakes add a Hershey's peppermint kiss on top, I tend to only put the kisses on half the cupcakes in case some prefer them without. Enjoy!


Snickerdoodle Cupcakes originally from Read it & eat
Makes 24 cupcakes

Ingredients
1 1/2 cups all purpose flour
1 1/2 cups cake flour
1 tablespoon baking powder
1 teaspoon salt
1 tablespoon ground cinnamon
2 sticks (1 cup) unsalted butter, room temperature
1 3/4 cups sugar
4 eggs
2 teaspoons vanilla extract
1 1/4 cups milk

Steps
1. Preheat oven to 350. Line cupcake tins and set aside.
2. Combine flour, cake flour, baking powder, salt and cinnamon and whisk to combine.
3. In a separate bowl beat with an electric mixer, butter and sugar until light and fluffy, about 3 minutes.
4. Beat in eggs one at a time, mixing well after each egg.
5. Blend in the vanilla.
6. On low speed, add in the dry ingredients in three additions alternating with the milk beginning and ending with the dry ingredients. Beat after each addition until well mixed.
7. Divide batter equally among the cupcake tins.  Bake 18-20 minutes, rotating halfway through.
8.  Cool completely before frosting.

Ingredients for Frosting
If piping double the recipe
8 oz cream cheese, room temperature
1 stick butter, room temperature
1 tablespoon vanilla extract
3-4 cups powdered sugar

Ingredients for Garnish
1 teaspoon ground cinnamon
2 tablespoons sugar
Stir together and dust on top of each cupcake

Steps
1. Combine cream cheese and butter until fluffy. Add vanilla extract.  Slowly add powdered sugar, mix well.
2. Frost the cooled cupcakes and add garnish to each cupcake.


Seven dozen cupcakes distributed among co-workers, friends, and my Pi Phi sisters and I still don't think that covered everyone sorry if you missed out on this go-round, promise it wasn't intentional!
 
One final recipe for today- I love when friends send me a link to a recipe or video or article that they just know I'm going to love and have to try (yes, this is a hint that you should send me over recipes that you'd like for me to try).  This is exactly what happened yesterday, Amanda sent me a video of how to make your own Peppermint tray. (It was on The Chew originally, thank you Clinton Kelly). This was SO easy to make and such a fun way to display my cupcakes at a recent Christmas party! I took pretty close to step by step pictures because I really didn't know how it was going to turn out, it turned out great!

You will need a cookie tray, wax paper, and a bag of peppermints.

1. Line your cookie tray with wax paper if you have any extra wax paper trim it so it doesn't hang over the tray.
2. Line up your peppermint candies with a little space in between each one.

3. Put it in the oven at 350 for 5-7 minutes- until the peppermints start to touch, once they are all touching remove the tray. 

4. Let it cool for about 30 seconds and then trim off the edges with a knife to make it nice and clean cut.

5. Use as a serving tray/statement piece at your next party!


Happy Holiday Baking!!!

Monday, December 15, 2014

Hot Cocoa Cupcakes - the Holidays are here!

December is usually a busy baking month for me...I say usually because we are halfway through December and I have only baked ONCE!!! Don't worry, I'll be at it again shortly and will make up for my lack of baking at the beginning of the month. My go-to cupcake recipe during December usually is a Chocolate cupcake with a Peppermint Cream Cheese Frosting but I wanted to try something different this year so I made Hot Cocoa cupcakes that I found on pinterest over a year ago. I have to admit I chose this recipe mostly for appearance but everyone raved on the taste too so I can't complain. I think the homemade whipped cream was what won so many over for this cupcake. When you are done, the cupcakes look like little cups of hot cocoa! Many have asked for the recipe so I won't make you wait any longer. 

Hot Cocoa Cupcakes originally from Lick the Bowl Good - makes 18 cupcakes

Ingredients for Cupcakes
1 1/2 cups all-purpose flour
1 1/4 cups sugar
1/4 cup cocoa powder
1 teaspoon baking soda
1/2 teaspoon baking powder
1/2 teaspoon salt
1/3 cup canola oil
1 cup prepared hot cocoa, cooled
1 teaspoon vanilla extract
2 eggs, lightly beaten
1/2 cup mini chocolate chips

Ingredients for Whipped Cream
1 1/4 cups heavy cream
1/3 cup powdered sugar
1/2 teaspoon vanilla extract

Garnishes
Mini marshmallows
Mini chocolate chips
Crushed peppermints - I actually used crushed peppermint bark, a delicious topping
18 mini candy canes

Steps for the Cupcakes
1.  Preheat oven to 350 degrees. Line cupcake tins with 18 liners.
2. In a large bowl, combine flour, sugar, cocoa powder, baking soda, baking powder, and salt.  Whisk dry ingredients thoroughly.
3. Add oil, prepared hot cocoa, vanilla and eggs to the dry ingredients.  Whisk until well incorporated and no lumps, stir in the chocolate chips.
4. Evenly divide the batter among the lined cupcake tins.
5. Bake the cupcakes for 18-20 minutes until a toothpick comes out cleanI still turn my pan halfway through baking. Allow to cool completely before frosting.

Steps for the Whipped Cream
1. Combine heavy cream, powdered sugar and vanilla extract.  Use an electric mixer on medium speed and beat until thick, creamy, and slightly stiff.  You want the whipped cream to be able to stand but you don't want to overbeat but make sure that it isn't still runny.

Assembling the Cupcakes
1. Pipe the whipped cream onto the cooled cupcakes.
2. Garnish with mini marshmallows, mini chocolate chips, and crushed peppermint.
3. Add a mini candy cane tucked into the side of the cupcake to make the handle of the hot cocoa "mug".
4. You can make ahead and cover and refrigerate but I do recommend saving the mini candy cane until right before you serve the cupcake!  The original recipe blog suggested covering and refrigerating leftovers....but leftover cupcakes are a foreign concept to me!

'Tis the Season
 
It doesn't take a lot for me to find a reason to bake so the reason I decided to make these adorable cupcakes was that some of my running buddies and I were getting together to run and look at Christmas lights and after we enjoyed Hot Cocoa, cookies, and these hot cocoa cupcakes! I would say they were a hit and we have started an annual tradition! Yes...we may run because we really love food! Below is a picture of us from our Christmas Light Run!


Thursday, December 4, 2014

Holiday Traditions

I love this time of year, Christmastime! We have so many family traditions around the holidays and that is what makes this time of year so special to me! I would love to hear some of your favorite family traditions.  I have always been use to be a stickler for NO Christmas decorations until after our Thanksgiving meal, however that seems to be harder each year to wait until after Thanksgiving.  I do my best to still wait until after Thanksgiving to decorate but may sneak some Christmas music here and there.  One of our traditions is a real Christmas tree and my mom has a very special way of putting lights on the tree to make it look amazing, I'm happy to say for the first time in the four years I've been decorating my very own tree I think I may have gotten it close to Mama Gordon standards! She was in town and helped instruct me but I put all the lights on my tree and am very happy with them minus a few bare spots that my OCD self can't quite handle but I'm getting there. Overall, I am very happy with my tree this year and love that I'm typing this blog post while sitting next to my beautifully lit tree with a Sparkling Snow candle burning - may I say 'Tis the Season!


One tradition we have always had growing up is that we make Stromboli while we decorate the house for Christmas! This recipe is easy to make ahead, freeze, and heat when needed!

Ingredients for Meat Mixture
1 pound ground beef
1 tablespoon fine chopped onion
1/2 cup tomato sauce
1/2 cup ketchup
2 tablespoons Parmesan cheese
1/2 teaspoon garlic powder
1/2 teaspoon fennel seed
1/8 teaspoon oregano
6 slices mozzarella cheese
This year we added pepperoni and salami slices

Steps
1. Brown beef and onion in a skillet.
2. Add tomato sauce, ketchup, Parmesan cheese, garlic and spices.
3. Cook for 20 minutes.

Ingredients for Bread Preparation
6 sub buns
2 tablespoons butter
1/4 teaspoon garlic powder
1/2 teaspoon paprika

Steps
1. Mix butter, garlic powder and paprika. Split buns and spread on butter mixture.
2. Put mozzarella cheese on bun. Put pepperoni and salami slices on bun.  Spread on meat mixture.
3. Wrap individually in tin foil.
4. Bake in tin foil at 350 for 15-20 minutes.  If you freeze, take out a day before and bake for 20 minutes or until cheese is melted.

Enjoy your Stromboli, Christmas music and get ready to decorate your home!


Another family tradition is that each year on Christmas Eve we received matching Christmas pajamas! A few years ago my mom took that special tradition and made it into something that I will always cherish - a beautiful quilt with some of our past pajamas. It is BEAUTIFUL and one of my favorite Christmas decorations to pull out each year.
 

There will be plenty of baking posts around the holidays but I just wanted to start off the season with some of my favorite traditions - don't forget to send me some of your holiday traditions tablespoonsandtastingforks@gmail.com

One last photo to leave you with, this is Harrison first Christmas tree and he seems to like it!

 
Merry Christmas

Thanksgiving Blessings

I love Thanksgiving for the time spent with loved ones and the time in the kitchen but I'm going to go ahead and open this blog post with a confession, I'm not a huge fan of Thanksgiving food but it is Thanksgiving so I do enjoy the traditional dishes each year.  This year I was thankful that I was able to host a small Thanksgiving meal for my mom and aunt. It was a wonderful way to spend the day and I hope that each of you were able to spend the day with your family and friends!

Now on to the prep of Thanksgiving- if you have ever hosted Thanksgiving you know it is not something you can throw together in an hour (and if it is, I want to know your secret).  I know I still have lots to learn about hosting the perfect Thanksgiving but each year I learn something new!  Thanksgiving prep begins days before Thanksgiving with making the menu, grocery shopping, cleaning, and prepping some of the dishes the night before. Thankfully if your mom comes into town for Thanksgiving you may just be able to convince her to do the grocery shopping! After we had all the ingredients I made the desserts the night before Thanksgiving and prepped the Cornbread for the dressing and made my time schedule for Thursday! My time schedule included anything and everything, even if I thought it was a given it went down on the schedule and am I thankful it did!  Okay, enough babbling about my routine for Thanksgiving this year let's get straight to the menu!

Menu
Honey-Garlic Infused Turkey
Creamed Corn
Sweet Potato Casserole
Cornbread Dressing
Sautéed Spinach
Cranberry Sauce
 
Desserts
Hummingbird Cake
Cheesecake
Pumpkin Cream Cheese Truffles

I won't go into much detail about the turkey, corn, or cranberry sauce but will give the recipes for everything else! In the past we have brined the turkey and this year we bought a honey-garlic seasoning that I injected into the turkey before putting it in the oven.  Creamed corn is my favorite, growing up we had my corn (creamed corn) and my siblings' corn (Corn pudding), while I've learned to like Corn Pudding it still isn't my first pick. I usually get the frozen creamed corn put a little butter in a pan on the stove and heat the corn through.  Finally, with the cranberry sauce we cheated and got the canned cranberry-it served the purpose!

Sweet Potato Casserole- recipe originally from Baked in Arizona 

Ingredients
3 1/2 to 4 cups sweet potatoes, mashed (I cheated and used canned sweet potatoes)
1 cup sugar
2 eggs
1 tsp vanilla
1/4 cup buttermilk
1/2 cup butter, melted

For the topping:
1/3 cup flour
1 cup pecans, chopped
1/3 cup butter, melted
1 cup brown sugar, packed

Steps
1. Pre-heat oven to 375 degrees. Grease a casserole dish
2. Combine sweet potatoes, sugar, eggs, vanilla, buttermilk and butter in a medium bowl.
3. Pour into casserole dish and bake for 25-30 minutes.

If you would like to make this dish ahead, mix everything up, cover and put it in the fridge.  When ready take it out and bake uncovered, it can be made up to 2 days before.

While the casserole is baking make the topping.  Combine flour, pecans, butter and brown sugar in a small bowl.  When casserole is done baking remove from oven and evenly sprinkle topping over it.  Bake for an additional 10-15 minutes.  The topping should be lightly browned and crunchy. Let it sit for 30 minutes before serving.

Cornbread Dressing - this is my GranMary's recipe
Ingredients
1 recipe of cornbread, baked and crumbled
6-8 slices of bread
Salt
Pepper
Celery Seed
Onion, chopped
Green pepper, chopped
1 1/2 teaspoon poultry seasoning
4 eggs
Lots of turkey juice, use Chicken Broth if you do not have enough juice from the turkey - you want it as moist as possible before you bake it

Steps
1. Break up cornbread and bread into crumbs.
2. Add all other ingredients and stir well.
3. Bake at 400 until brown - about 45 minutes


Sautéed Spinach- found through Pinterest this is not a traditional Thanksgiving side for me but it was delicious and will definitely be repeated as an everyday side

Ingredients
1 tablespoon olive oil
2 cloves garlic
2 bags spinach, rinsed
1 tablespoon lemon juice I was out of lemon juice so substituted lime juice
1/4 teaspoon salt

Steps
1. Heat oil in saucepan on medium-high until hot, add garlic and cook 1 minute or until golden.
2. Add spinach, in 2 - 3 batches.  Cook 2 minutes or until all spinach is in the pot.  Cover and cook 2 to 3 more minutes stirring once. 
3. Remove from heat and stir in lemon juice and salt.

Finally, it is dessert time!!

Hummingbird Cake I have a difficult time explaining this recipe to friends but after several friends tried it and fell in love with it this week I don't think it needs much of a description...it is covered in Cream Cheese Frosting, enough said! This cake recipe is one of my favorites from my mom's cookbook compilation of our favorite recipes.

Cake Ingredients
3 cups all purpose flour
2 cups sugar
1 teaspoon baking soda
1 teaspoon salt
1 teaspoon cinnamon
3 eggs, beaten
1 1/2 teaspoons vanilla
1 1/4 cups vegetable oil
8 ounces crushed pineapple, undrained
1 cup chopped pecans
2 cups chopped bananas

Steps
1. Preheat oven to 350 degrees.
2. Sift together flour, sugar, baking soda, salt, and cinnamon.
3. Add eggs, vanilla, and oil.
4. Stir in pineapple, pecans, and bananas.
5. Pour mixture in greased cake pans.  Bake at 350 for 30 minutes.  This recipe made 3 layers.

Cake Frosting Ingredients
1/2 cup margarine, softened
8 ounces cream cheese, softened
16 ounces powdered sugar
1 teaspoon vanilla

Steps for Frosting
1. Cream margarine and cream cheese together.
2. Blend in sugar and vanilla.
3. Frost on the cake.

Hummingbird cake is best each day after baking and the cake needs to be refrigerated after baking but served closer to room temperature.

Pumpkin Cream Cheese Truffles - I told you it was my new favorite fall dessert and in case you didn't make it after the first blog post I'm reposting the recipe

Ingredients
1/2 cup of white chocolate chips
1/3 cup gingersnap cookie crumbs
1/4 cup canned pumpkin puree
1/4 cup graham cracker crumbs, plus more for garnish
1 tablespoon confectioners' sugar
1/2 teaspoon orange zest
1/8 teaspoon ground cinnamon
Pinch of fine salt
2 ounces cream cheese, softened
2 cups white chocolate almond bark I used 3 cubes

Steps
1. Melt the 1/2 cup of white chocolate chips, stir often to avoiding burning.  Transfer to mixing bowl.
2. Add gingersnap crumbs, pumpkin, graham cracker crumbs, sugar, zest, cinnamon, salt and cream cheese and beat with electric mixer until smooth.
3. Cover and chill in fridge for about 2 hours or until solid enough to roll into balls.
4. Line a cookie sheet with parchment paper and work on rolling mixture into balls (about 1 teaspoon).  I then put the cookie sheet in the freezer for about 30 minutes.
5. Melt almond bark, at no more than 30 second intervals, stirring often until melted. Dip truffle in chocolate and place back on cookie sheet and refrigerate until completely set, about 1 hour.
6. Sprinkle with graham cracker crumbs and ENJOY!

Happy Thanksgiving


I hope you had a wonderful Thanksgiving and maybe next year can add some of these recipes to your table!

Monday, November 24, 2014

Pumpkin Cream Cheese Truffles

Have I mentioned I really love all things pumpkin? Add in cream cheese and white chocolate (and a few other ingredients) and I'm 100% certain you have my new favorite fall dessert! A few days ago, I pinned a pumpkin cream cheese cake ball recipe which connected me to this recipe for pumpkin cream cheese truffles and I decided this weekend was the perfect time to test it out. I find Pinterest to be a blessing and a curse, blessing-I find so many new recipes to try, curse- finding the time to make all of these new recipes. Let's just say, this recipe was a hit and I'm officially obsessed!

I suggest making this recipe a day before you need it, so that you are not rushed for time, it is an easy recipe but not one that can be done in a pinch.  The "dough" needs to set before you roll it into balls and before you dip it in the chocolate.

Ingredients
1/2 cup of white chocolate chips
1/3 cup gingersnap cookie crumbs
1/4 cup canned pumpkin puree
1/4 cup graham cracker crumbs, plus more for garnish
1 tablespoon confectioners' sugar
1/2 teaspoon orange zest
1/8 teaspoon ground cinnamon
Pinch of fine salt
2 ounces cream cheese, softened
2 cups white chocolate almond bark I used 3 cubes

Steps
1. Melt the 1/2 cup of white chocolate chips, stir often to avoiding burning.  Transfer to mixing bowl.
2. Add gingersnap crumbs, pumpkin, graham cracker crumbs, sugar, zest, cinnamon, salt and cream cheese and beat with electric mixer until smooth.
3. Cover and chill in fridge for about 2 hours or until solid enough to roll into balls.
4. Line a cookie sheet with parchment paper and work on rolling mixture into balls (about 1 teaspoon).  I then put the cookie sheet in the freezer for about 30 minutes.
5. Melt almond bark, at no more than 30 second intervals, stirring often until melted. Dip truffle in chocolate and place back on cookie sheet and refrigerate until completely set, about 1 hour.
6. Sprinkle with graham cracker crumbs and ENJOY!


Happy Fall Baking!


Sunday, November 16, 2014

Football games call for Dessert - Crimson Velvet vs Mississippi (State) Mud

For the Alabama game this weekend I made themed dessert! Crimson Velvet cupcakes and Mississippi (State) Mud! Red Velvet is one of my most requested flavors to bake for my friends- it is definitely a frequent repeat.  And lately I've really been wanting to make Mississippi Mud so what better reason than a football game that I can cleverly word the teams' names into my dessert!

Red Velvet
Ingredients
2 1/2 cups cake flour
1 1/2 cups sugar
1 tsp baking soda
1 tbsp cocoa powder
1 tsp salt
2 large eggs
1 1/2 cups vegetable oil
1 cup buttermilk
2 tbsp (1 oz.) liquid red food coloring
1 tsp vanilla extract
1 tsp distilled white vinegar
Steps
1. Preheat oven to 350.
2. Line cupcake pans with paper liners.
3. Combine cake flour, sugar, baking soda, cocoa powder and salt; whisk to blend.
4. With electric mixer, combine eggs, vegetable oil, buttermilk, food coloring, vanilla, and vinegar. Beat on medium speed until well blended.
5. Mix in dry ingredients on low and beat until smooth, about 2 minutes.
6. Divide batter evenly. Bake, rotating pans halfway through baking, until a toothpick comes out clean, about 18 minutes. Let cool in pans for 5-10 minutes then cool completely on a wire rack before icing.

Ingredients for Cream Cheese Frosting
8 oz cream cheese
5 tbsp unsalted butter
2 tsp vanilla extract
2 1/2 cups powdered sugar, sifted

Steps for Frosting
1. Combine cream cheese and butter with electric mixer. Beat on medium speed until well combined and smooth, about 2-3 minutes. Mix in vanilla extract. Gradually best in powdered sugar. Increase speed and beat until smooth.
2. If using an icing tip for the cupcakes, make 1.5 to 2x the original recipe above!


Mississippi Mud
 
Ingredients

1 cup butter
1/2 cup cocoa
2 cups sugar
4 eggs slightly beaten
1 1/2 cup flour
Pinch of salt
1 1/2 cup chopped pecans
1 teaspoon vanilla
Miniature marshmallows

Ingredients for Chocolate Frosting
16 ounces powdered sugar
1/2 cup milk
1/3 cup cocoa
4 tablespoons butter, softened
Combine all ingredients and mix until smooth!

Steps
1. Preheat oven to 350.
2. Melt butter and cocoa. Remove from heat and stir in sugar, eggs - mix well.
3. Add flour, salt, pecans, vanilla and mix well.
4. Spoon batter into greased 13 x 9 pan and bake for 35-45 minutes.
5. Sprinkle Marshmallows on warm cake and cover with chocolate frosting.

Tear into the Mississippi (State) Mud and Celebrate with the Crimson Velvet!
 
If you frosting melts like this- add more powdered sugar.
 
 
Happy Baking!

Tuesday, October 14, 2014

Pumpkin Fest 2.0

If you know me at all or if you've read the blog for a while you've probably heard once or twice that I LOVE Pumpkin! All things pumpkin! Last year my friends and I gathered to share our love of pumpkin and coined our dinner party "Pumpkin Fest".  We decided it would be an annual event and starting planning this year's Pumpkin Fest (aka Pumpkin Fest 2.0) at the beginning of September, it was that important we could not miss it this year and finally set the date for this past Saturday, October 11th.  I truly believe this year was an even bigger hit.  We had an amazing menu that could not have been possible without the help of everyone!

Menu
Pumpkin Stuffed with Everything Good recipe included
Biscuits and Pumpkin Butter
Pumpkin Sausage Pasta recipe included
Pumpkin Bourbon Sangria recipe included
Pumpkin Cupcakes with Salted Caramel recipe included
Sweet Pumpkin dip with graham crackers
Coffee with Pumpkin Creamer

Enough blabbering, on to the recipes!

Pumpkin Stuffed with Everything Good -Daly made this dish and it was absolutely FANTASTIC! She got the recipe originally from Epicurious, she made two pumpkins - one with bacon and one without - you can't go wrong! Since I didn't make this dish I am going based off the directions on the blog, no worries I will be making this SOON and can update any notes as needed but I think this will cover you completely.

Ingredients
  • 1 pumpkin, about 3 pounds
  • Salt and freshly ground pepper
  • 1/4 pound stale bread, thinly sliced and cut into 1/2-inch chunks
  • 1/4 pound cheese, such as Gruyère, Emmenthal, cheddar, or a combination, cut into 1/2-inch chunks
  • 2–4 garlic cloves (to taste), split, germ removed, and coarsely chopped
  • 4 slices bacon, cooked until crisp, drained, and chopped
  • About 1/4 cup snipped fresh chives or sliced scallions
  • 1 tablespoon minced fresh thyme
  • About 1/3 cup heavy cream
  • Pinch of freshly grated nutmeg

  •  
    Steps
    1. Preheat oven to 350 degrees.
    2. Line a baking sheet with parchment paper.
    3. Cut a cap out of the top of the pumpkin, clear away the seeds and strings from the cap and inside of the pumpkin.
    4. Season inside of pumpkin with salt and pepper and put it on the baking sheet.
    5. Toss the bread, cheese, bacon and herbs together in a bowl. Season with pepper and pack into the pumpkin. The pumpkin should be well filled.
    6. Stir the cream with the nutmeg and some salt and pepper and pour into the pumpkin.  You want the ingredients nicely moistened but not swimming in the cream.
    7. Put the cap in place and bake the pumpkin for about 2 hours - check after 90 minutes - until everything inside the pumpkin is bubbling and flesh of the pumpkin is tender enough to be pierced with the tip of a knife.
    8. Remove the cap during the last 20 minutes of baking and let the liquid bake away and the stuffing brown a little.
    9. Transfer very carefully to a platter for presentation.
     
    You can either spoon out portions of the filling or cut it in slices so everyone will get ample amounts of pumpkin. We were a little nervous about slicing Saturday night but it worked out perfectly. It is best served as soon as it is ready.
     
    Thank you Daly for this great new pumpkin recipe! I can't wait to make it sometime this fall.
     
    Pumpkin Sausage Pasta - If you've been reading my blog lately you know that this is my new go-to fall recipe! I mixed it up a little this weekend and made it with Turkey Sausage. Just as a reminder I originally got this recipe from Mix and Match Mama.

    Ingredients
    1 pound pasta (I used whole wheat penne)
    1 pound sausage (I used turkey sausage this time- yum!)
    3 garlic cloves, chopped (I used 1 1/2 tsp of minced garlic)
    1 onion, chopped
    1 cup chicken broth
    1 cup of pumpkin
    Freshly Grated Parmesan Cheese
    Extra Virgin Olive Oil
    Salt and Pepper to taste (I actually didn't add either of these, I don't think it needed it but that could be your choice)

    Steps
    1. Bring one large pot of water to a boil for pasta. Cook pasta until cooked completely.
    2. In another large skillet, heat a tablespoon of olive oil over medium-high heat. Brown and crumble the sausage.
    3. After the sausage has browned, add in onion and garlic and sauté 4-5 minutes.
    4. Once sausage and onion mixture is sautéed, add in the chicken broth, lower heat to low and let chicken broth simmer 2-3 minutes.
    5. Stir in pumpkin and heat through about 3 minutes.
    6. Drain your pasta and add to the sausage pan.
    7. Stir in cheese and enjoy!

    Pumpkin Bourbon Sangria - A little background on why I chose this drink choice to include in our Pumpkin Fest, October 11th was 18 years since my dad passed away and usually on his birthday and the day he passed my sister and I like to do things that remind us of him - donuts are a MUST and usually pizza and bourbon in his honor. So I wanted to incorporate a bourbon drink into our Pumpkin Fest and found Pumpkin Bourbon Sangria - It won my vote by a landslide!  I highly recommend actually making this 24 hours before serving it (a step I missed), but that gives it plenty of time to chill and the flavors to set. I found this recipe off the one and only Pinterest from Kiran Tarun.

    Ingredients
  • 2 small honeycrisp apples, thinly sliced
  • 1 orange, thinly sliced
  • 1/2 tsp salt
  • 1/2 tsp ginger powder
  • 1 tsp whole cloves
  • 3 cinnamon sticks
  • 2 tbsp pumpkin butter or puree
  • 1 cup apple or pumpkin flavored bourbon (I went with straight bourbon- had an impossible time finding pumpkin bourbon!)
  • 2 cups apple cider
  • 1 bottle of pink rosé wine

  • Steps
    1. Add all ingredients into a tall large pitcher. Stir to combine and refrigerate for at least 24 hours. If you are reading this with only 6 hours until your event, do not worry, you can still make this drink!
    2. Serve over ice! Enjoy!


    Pumpkin Cupcakes with Salted Caramel Buttercream Frosting - another fall favorite! I kept saying I was going to try a different pumpkin recipe but when you find a tried and true one it is hard to stray from it! I originally got this recipe from Made in Melissa's Kitchen and it has been a few years since I posted it so we could all use a refresher!

    Ingredients for Pumpkin Cupcakes
    2 cups all-purpose flour
    1 teaspoon baking soda
    1 teaspoon baking powder
    1 teaspoon coarse salt
    1 teaspoon ground cinnamon
    1 teaspoon ground ginger
    1/4 teaspoon grated nutmeg
    1/4 teaspoon ground allspice
    1 cup packed brown sugar
    1 cup granulated sugar
    1 cup (2 sticks) unsalted butter, melted and cooled
    4 large eggs, lightly beaten
    1 can (15 ounces) pumpkin puree

    Steps
    1. Preheat oven to 350 degrees, line cupcake pans and set aside.
    2. In a medium bowl, whisk together the flour, baking soda, baking powder, salt, cinnamon, ginger, nutmeg and allspice; set aside.
    3. In another bowl combine the brown sugar, granulated sugar, butter and eggs. Beat on medium speed until well combined. Add dry ingredients and beat on low until smooth.  Fold in the pumpkin puree.
    4. Fill each cupcake liner about halfway and bake for 20-25 minutes, rotate the pans once halfway through baking.  Transfer to wire rack and let cool completely.

    Ingredients for Salted Caramel Buttercream Frosting
    1/4 cup granulated sugar
    2 tablespoons water
    1/4 cup heavy cream
    1 teaspoon vanilla extract
    1 stick salted butter
    1 stick unsalted butter
    1/2 teaspoon sea salt
    2 cups powdered sugar

    Steps
    1. In a saucepan stir granulated sugar and water. Bring to a boil over medium high heat.  Cook without stirring until mixture turns a deep amber color, about 10 minutes (but watch it closely and don't just go by the time, it can burn easily). Remove from heat and slowly add in cream and vanilla, stirring until smooth.  Let caramel cool for about 20 minutes until it is just barely warm and still pourable.
    2. In a medium bowl, beat butter and salt together until light and fluffy. Reduce to low speed and add powdered sugar. Mix until well combined.
    3. Scrape down the sides of the bowl and add caramel.  Beat on medium speed until light and airy and completely mixed, about 2 minutes.  You should be ready to frost your cupcakes! If the caramel was too warm when you added it, your icing will be runny and should refrigerate for 15-20 minutes.

    Enjoy!


    I hope you all enjoyed this review of Pumpkin Fest 2.0, I'm sure it will not be the last pumpkin related post for the fall season but it is the most pumpkin packed! Happy Fall!

    Wednesday, September 24, 2014

    It's Fall Y'all

    We welcomed the first day of fall this week and that means cooler weather, football, boots, and of course PUMPKIN! I love fall! So tonight I'm writing this entry with an Autumn Harvest candle burning and a delicious fall recipe to share. If you look back at past entries (and I'm sure there will be more in the future) you know that I love pumpkin - pumpkin spice lattes, pumpkin stuffed shells, pumpkin beer, and of course pumpkin cupcakes!

    In anticipation of fall I started searching Pinterest weeks ago for some new pumpkin recipes and stumbled across this Pumpkin-Sausage Pasta recipe, some of my favorite things in one recipe how could I not try it?! I have  to say, this recipe is so simple to make and will definitely be repeated lots this fall. Okay, I've rambled enough about my love for fall and my love for this new dish let me get to the recipe!  Enjoy!!

    Pumpkin-Sausage Pasta (originally from Mix and Match Mama)

    Ingredients
    1 pound pasta (I used whole wheat penne)
    1 pound sausage (I used pork but you can use chicken or turkey-will try with turkey next time)
    3 garlic cloves, chopped (I used 1 1/2 tsp of minced garlic)
    1 onion, chopped (make this easy on yourself and get the pre-chopped onion)
    1 cup chicken broth
    1 cup of pumpkin (not pumpkin pie filling, I used canned Libby's pumpkin)
    Freshly Grated Parmesan cheese
    Extra Virgin Olive Oil
    Salt and Pepper to taste (I actually didn't add either of these, don't think it needed it)

    Steps
    1. Bring one large pot of water to a boil for pasta. Cook pasta until cooked completely.
    2. In another large skillet, heat a tablespoon of olive oil over medium-high heat. Brown and crumble the sausage.
    3. After sausage has browned, add in onion and garlic and sauté 4-5 minutes.
    4. Once sausage and onion mixture is sautéed add in chicken broth, lower heat to low and let chicken broth simmer 2-3 minutes.
    5. Stir in pumpkin and heat through about 3 minutes.
    6. Drain your pasta and add to the sausage pan.
    7. Stir in cheese and enjoy!!

    Happy Fall Y'all!


    Saturday, September 13, 2014

    Dinner's Ready...for weeks!

    I think we can all agree if dinner isn't prepped it is far too easy to make an excuse not to eat at home.  I'm trying to be better about cooking and prepping my meals ahead of time, so today I took a few hours (really less than 2), and prepped some freezer meals for the coming weeks! Also helps if you get together with friends, it makes the meal prep more fun and go by in no time.  Nancy and I got together today as she prepped her meals to have ready when her baby girl arrives in a month.  We had such success today we are definitely thinking of making it a regular thing and I have even heard of a "Freezer Meal Club", where 4-5 friends get together and everyone brings a copy of one dish for everyone so you walk away with 5 different meals!

    I focused on a lot of Crockpot recipes and walked away with 7 different recipes and multiple batches! Especially since the recipes are meant for families I will have plenty to eat off of but I don't mind, it will make it last longer.  So I did a lot of Pinterest searching and narrowed down the recipes I wanted to try, made my grocery list, got all the ingredients and labeled my Ziploc bags with the recipe names and cooking instructions, all was set for our preparation today.  I did make one recipe that is not intended for the crockpot but still a great freezer meal.  On to the recipes!

    Chicken Teriyaki (found on Mommy's Fabulous Finds obviously from a Pinterest search)
    Ingredients
    Large bag of baby carrots
    Red Onion sliced into large chunks
    2 cans (20 oz each) Crushed Pineapple (un-drained)
    4 garlic cloves (I used 2 tsp. of minced garlic)
    4-6 boneless chicken breasts
    1 cup Teriyaki sauce

    Directions
    Split ingredients in half, place all ingredients in 2 resealable gallon Ziploc bags, mix together and zip closed.
    When ready to eat, remove from freezer and thaw in fridge overnight.  Cook in crockpot on Low for 6-7 hours.
    Serve over rice.
    --------------------------------------------------------------------------------------------------
    Cilantro Lime Chicken (found on Six Sisters' Stuff)
    Ingredients
    1.5 lbs chicken breasts
    Juice from 2 limes
    1 bunch fresh cilantro, chopped
    1 (16 oz) bag frozen corn
    2 minced garlic cloves
    1/2 red onion, chopped
    1 can black beans, drained and rinsed
    1 tsp cumin
    Salt and pepper to taste

    Directions
    Place all ingredients in a resealable gallon Ziploc bag. Mix together and zip bag closed.
    When ready to eat, remove from the freezer and thaw in the fridge for 24 hours.  Cook in the crockpot, on High for 4 hours, Low for 8 hours.
    Serve with tortillas and toppings such as sour cream, guacamole, salsa, and cheese.
    -----------------------------------------------------------------------------------------------------
    Maple Dijon Glazed Chicken (found on Six Sisters' Stuff)
    Ingredients
    1 1/2 lbs chicken breasts
    1 cup Dijon mustard
    1/2 cup Maple syrup
    2 Tablespoons red wine vinegar
    Salt and Pepper to taste

    Directions
    Place all ingredients in a resealable gallon sized Ziploc bag.  Mix together and zip closed.
    When ready to eat, remove from freezer and thaw in the fridge for 24 hours.  Cook in the crockpot on high for 4 hours, low for 8.  Sprinkle with fresh or dried rosemary.
    ------------------------------------------------------------------------------------------------------
    BBQ Cranberry Chicken (found on Six Sisters' Stuff)
    Ingredients
    2 lbs chicken breasts
    1/4 cup dried minced onion
    1 (16 oz.) can whole cranberry sauce
    1 cup barbeque sauce

    Directions
    Combine all ingredients in a resealable gallon size Ziploc bag and zip closed, air tight and freeze.
    When ready to eat, remove from freezer and thaw in fridge for 24 hours.  Cook in the crockpot on High for 3-4 hours or Low for 6-7 hours.
    ------------------------------------------------------------------------------------------------------
    Honey Lime Chicken (found on Claire's Healthy Home)
    Ingredients
    1/2 cup honey
    1/3 cup soy sauce
    1/4 cup lime juice
    6 chicken breasts

    Directions
    When ready to eat, remove from freezer and thaw in fridge overnight.  Bake at 350 for 30 minutes.
    Can be served with baked sweet potatoes and vegetables.
    ------------------------------------------------------------------------------------------------------
    Creamy Ranch Pork Chops and Potatoes (found on Six Sisters' Stuff)
    Ingredients
    1 1/2 lbs pork chops, boneless (about 4-6, thick sliced)
    6-8 medium potatoes, chopped into large pieces
    2 (10.75 oz each) cans Cream of Chicken soup
    2 (1 oz each) dry Ranch dressing mix
    1 cup milk (I used Almond milk)
    Dried parsley to sprinkle on top (optional)

    Directions
    In a bowl mix together soups, milk and ranch dressing mixes and pour into a resealable gallon Ziploc bag. Combine all ingredients and zip closed.
    When ready to eat, remove from freezer and thaw in fridge for 24 hours. Cook in the crockpot on High for 3-4 hours or Low for 6-7 hours.
    Use the extra sauce in the crockpot as a gravy for the potatoes and pork chops. Sprinkle with dried parsley if you want.
    ------------------------------------------------------------------------------------------------------
    Pineapple Glazed Ham (found on Six Sisters' Stuff)
    Ingredients
    4 thick slices of ham, fully cooked
    1/3 cup brown sugar
    1 (20 oz) can crushed pineapple (do not drain)
    2 Tbsp Dijon Mustard (optional)

    Directions
    Mix together brown sugar, pineapple and mustard in a resealable gallon-sized Ziploc bag.  Place ham slices inside bag and zip closed.
    When ready to eat, remove from freezer and thaw in fridge for 24 hours. Cook in the Crockpot on High for 3 hours or Low for 5-6 hours.

    Ziploc Bag Preparation (remember to write cooking instructions on each bag)

     
    A little action shot of preparation


    Meals prepped and ready to be stored in the freezer!


    Eliminate a lot of stress about what's for dinner by setting aside a few hours on the weekend to get things ready for the weeks ahead!  Happy Meal Planning!


    Wednesday, September 10, 2014

    Chile and Lime Roasted Salmon

    Salmon! I love it, it is so easy to make and healthy for you in a number of ways. I keep a big bag of frozen salmon in the freezer and that way I can take a few fillets out in the morning and whip up a seasoning before putting it in the oven for a little bit. 

    So, my most recent salmon recipe try was  Chile and Lime Roasted Salmon served with Blueberry Corn and Basil Salsa, yum! I was originally directed to this recipe from Sweet Little Bluebird's blog (can we pause and just say how this blog was meant for me?!?!) On Sweet Little Bluebird, she mentioned this entire receipt combo and directed me to Heather Christo's blog for the recipes! Before I dive into the recipes let me just say, this was so easy to put together and delicious.  I played around with the ingredients a bit since my salmon fillets weren't quite as big as Heather's portions. Below are the recipes for the Chile and Lime Roasted Salmon and Blueberry Corn and Basil Salsa, recipes are as is, not with my modifications!  Enjoy!


    Chile and Lime Roasted Salmon (originally from Heather Christo's blog)

    Ingredients

    • 1 side of salmon, about 3.5 pounds (I used a couple of fillets)
    • 2 tablespoons olive oil
    • 2 limes, zested
    • 1 jalapeno
    • kosher salt to taste
    Steps
    1. Preheat oven to 350. Cover a baking sheet with parchment paper or foil.
    2. Place salmon on baking sheet.
    3. Drizzle salmon with 2 tablespoons of olive oil then sprinkle with lime zest.  Finely grate the jalapeno over the salmon. Squeeze the juice of one lime over the fish and season with kosher salt.
    4. Once the oven is hot, place the salmon in the oven and roast for 10 minutes. 
    5. Serve salmon hot with the Blueberry Corn Salsa.
     
    Blueberry Corn and Basil Salsa (also from Heather Christo's blog)
     
    Ingredients
    • 1 ear fresh raw corn, cut off the cob
    • 1 cup blueberries
    • 1/2 red onion, finely diced
    • 1 red chili, thinly sliced
    • 1/2 cup basil, thinly sliced
    • 1 tablespoon olive oil
    • 1 lime zested and juiced
    • kosher salt to taste
    Steps
    1. In a Medium bowl, toss together the corn, blueberries, onion, chili and basil.  Drizzle with olive oil and add the lime zest and juice.  Salt to taste.   
     
    Chili and Lime Roasted Salmon with Blueberry Corn and Basil Salsa


    I served with a side salad and loved it. Happy Cooking!
     

    Sunday, August 10, 2014

    Tablespoons & Tasting Forks Announcement

    Tablespoons & Tasting Forks has an updated email address!! So if you have questions about blog entries, recipes to recommend, or would like to order cupcakes for a special occasion, email Tablespoons & Tasting Forks now!  Sweet and simple announcement but I'm excited about having a direct email connection to my blog and love for baking and cooking and everything in between!

    Wednesday, July 23, 2014

    Black Bean Chicken

    Occasionally I do make something that doesn't contain sugar and cream cheese frosting...but only occasionally! :)  Unfortunately I don't have a picture of this meal but that's okay, you'll get the picture with just the recipe.  I found this recipe on SparkRecipes and absolutely love it for a few reasons 1)It is a crockpot meal, 2) It has FOUR ingredients and 3)you can eat it several different ways!

    Ingredients
    1 pound boneless, skinless chicken
    2 cans of Black Beans
    1 jar of salsa (16 oz)
    1/2 cup of uncooked brown rice

    Steps
    1. Place uncooked chicken in crockpot
    2. Pour black beans (undrained), salsa, and uncooked rice on top of chicken.
    3. Cook on low for 8-10 hours and serve.

    Ideas of how to eat this delicious meal
    * As is, delicious!
    * Topped with a little shredded cheese.
    * In a tortilla.

    I hope you enjoy this meal, you can also freeze it and heat it up later!  Did I mention because it is a crockpot meal you come home to an AMAZING smelling house?!  Also, I challenge you to share some of your favorite go-to recipes with me, always looking for something new to try!

    Monday, July 21, 2014

    I do...Cupcakes

    It has been a while since I've updated the blog and I have missed it and my followers OH SO MUCH! I use my blog mostly as my go-to cookbook, so when I realize I am making the same recipe over and over again and it isn't on the blog I know it is time for a new post!

    I was asked to make cupcakes for a friend's wedding this past weekend, I was honored she asked me to make her wedding cupcakes! We met up and talked about what flavors she wanted and how many and the details of it all! The one flavor Daly knew she wanted was my Salted Caramel frosting, which I usually do with a Pumpkin Spice cupcake, but her wedding was in July, there was no way I could do pumpkin! So we decided chocolate would pair very well with Salted Caramel frosting.  The other cupcake flavor that we decided on for her big day was Champagne! I truly had so much fun being a part of this wedding and getting to share my cupcakes for the big day!! 

    Let's start with the Champagne recipe since that is the one I realize is no where on the blog (and VERY far back on my Pinterest board).  This recipe is originally from The Doctor's Dishes, Desserts & Décor. 

    Champagne Cupcakes with Champagne Buttercream (makes 18)

    Ingredients for Cake
    1/2 cup butter, room temperature
    1 cup granulated sugar
    2 eggs
    1 tsp vanilla
    1 3/4 cups flour
    1/2 tsp baking soda
    1/4 tsp baking powder
    1/4 tsp salt
    1/2 cup sour cream
    1/2 cup champagne

    Steps for Cupcakes
    1. Preheat oven to 350 degrees.
    2. Cream butter and sugar until light and fluffy.  Add eggs one at a time, beating well after each one.  Add vanilla and mix.
    3. Whisk together flour, baking soda, baking powder and salt, set aside. 
    4. Whisk together champagne and sour cream (mixture will fizz a little).
    5. Add flour and champagne mixture to butter and sugar, alternating, beginning and ending with flour.  Batter will be thick.
    6. Fill cupcake tin 2/3 full. Bake for 18-20 minutes.

    Ingredients for Champagne Buttercream
    1 cup plus 1 tablespoon champagne
    1 cup butter, at room temperature
    3-4 cups powdered sugar

    Steps for Frosting
    1. Place 1 cup of champagne in a small saucepan over medium-high heat until reduced to 2 tablespoons.  Transfer to a bowl and allow to cool.
    2. Mix butter and powdered sugar together.  Once frosting is thick and fluff, pour in the reduced 2 tbsp. champagne plus 1 tbsp. champagne from bottle and mix well.
    3. Frost cupcakes with desired cake tip (I use the star tip for this frosting and dust with edible pearls).
    I typically double this recipe when using the icing guns (note that the above ingredients are NOT doubled).

    Now, on to the Chocolate with Salted Caramel! Both of these recipes are previously on the blog but I'm going to post them again!

    Chocolate Cupcakes (makes 24) originally from Glorious Treats

    Ingredients for Cake
    2 cups sugar
    1 3/4 cups all purpose flour
    3/4 cups unsweetened cocoa
    1 1/2 teaspoons baking powder
    1 1/2 teaspoons baking soda
    1 teaspoon salt
    2 eggs
    1 cup whole milk
    1/2 cup vegetable oil
    2 teaspoons vanilla extract
    1 cup boiling water

    Steps for the Cupcakes
    1. Preheat the oven to 350 degrees.
    2. In a large bowl, stir together sugar, flour, cocoa, baking powder, baking soda, and salt.
    3. Add eggs, milk, oil and vanilla. Beat on medium speed for about 1 minute.
    4. Stir in boiling water (your batter will be thin, this is correct).
    5. Fill liners about 2/3 full.
    6. Bake for 22-24 minutes, I still turn the pan halfway through.
    7. Cool completely before frosting.

    Salted Caramel Frosting originally from Made in Melissa's Kitchen
    Ingredients
    1/4 cup granulated sugar
    2 tablespoons water
    1/4 cup heavy cream
    1 teaspoon vanilla extract
    1 stick salted butter
    1 stick unsalted butter
    1/2 teaspoon sea salt
    2 cups powdered sugar

    Steps for Frosting
    1. In a saucepan stir granulated sugar and water. Bring to a boil over medium high heat. Cook without stirring until mixture turns a deep amber color, watch it closely (very easy to burn the caramel). Remove from heat and slowly add in cream and vanilla, stirring until smooth. Let caramel cool for about 20 minutes until it is just barely warm and still pourable.
    2. In a medium bowl, beat butter and salt together until lightened and fluffy. Reduce to low speed and add powdered sugar. Mix until well combined.
    3. Scrape down the sides of the bowl and add caramel. Beat on medium speed until light and airy and completely mixed, about 2 minutes. You should be ready to frost your cupcakes! If the caramel was too warm when you added it your icing will be runny and you should refrigerate for 15-20 minutes.
    4. I used a round tip to ice these cupcakes. Again, I double this recipe and amounts listed above the original portions not the doubled portion.


    Best Wishes to Daly and Riley!